

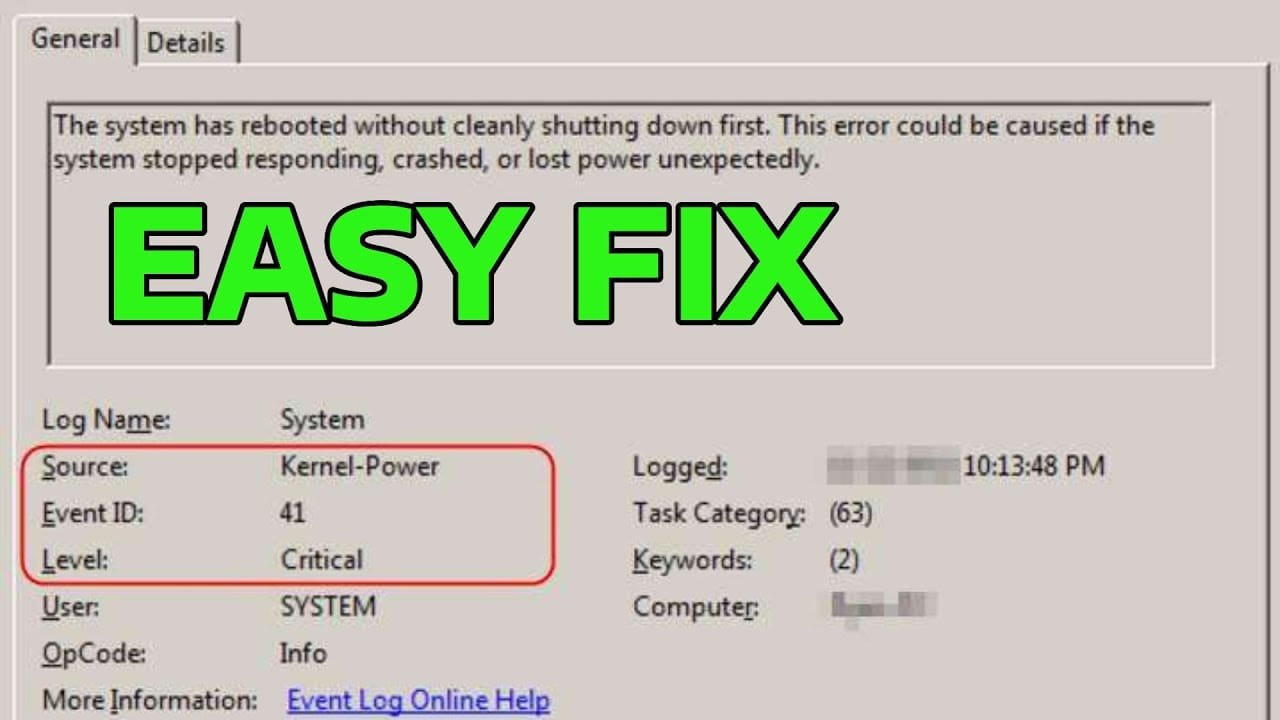
A Kernel Power 41 Error is a common issue that can disrupt your device performance. If you are experiencing a Kernel Power 41 Error, this 2026 step-by-step diagnostic guide will help you troubleshoot and resolve the problem quickly.
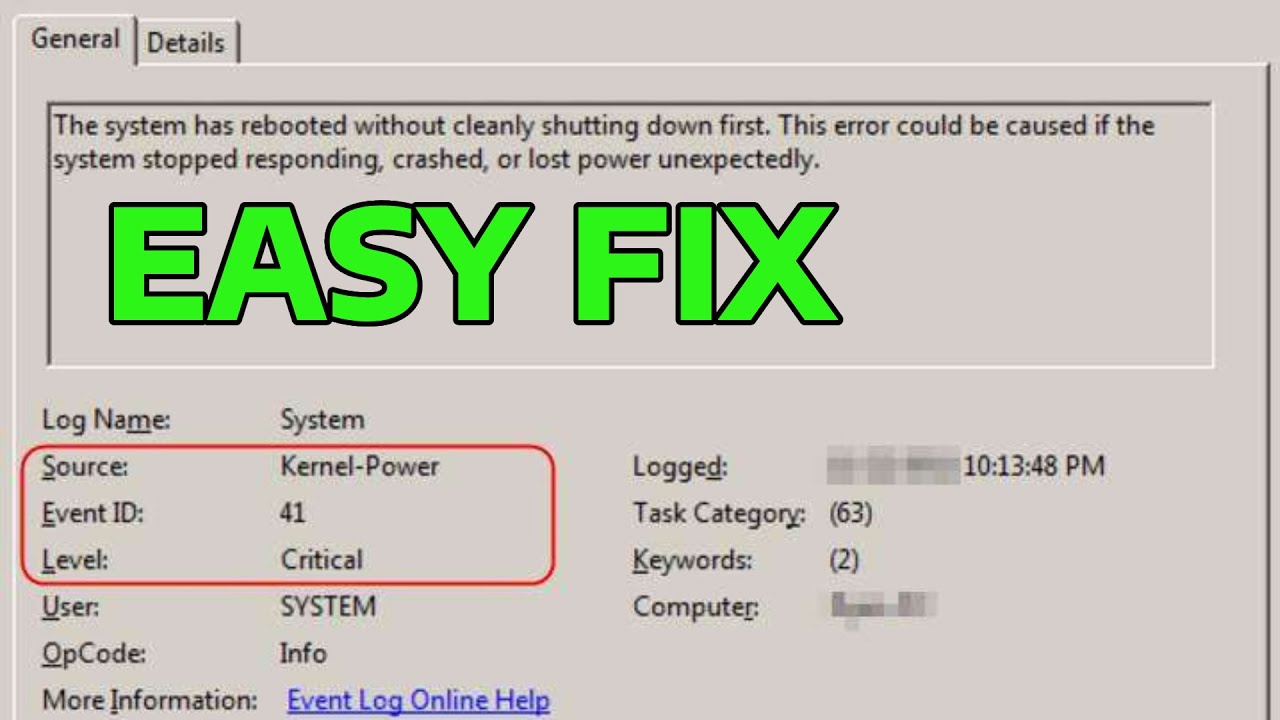
Table of Contents
Understanding the Kernel Power 41 Error
The critical error, often logged as Event ID 41, Source Kernel-Power, signifies an unexpected shutdown or restart of your computer. This issue indicates that Windows was not properly shut down, which can lead to data loss or system instability. Furthermore, it often points to underlying hardware or driver conflicts.
Specifically, this problem typically occurs when the system recovers from an unexpected reboot. It doesn’t always specify the root cause directly. Therefore, a systematic diagnostic approach is crucial to pinpoint the exact problem. Identifying the triggers is the first step towards a lasting solution.
Initial Diagnostic Steps for Kernel Power 41 Error
Initially, check your power supply connections. Ensure all cables are securely plugged into your computer and the wall outlet. Loose connections are a surprisingly common cause of unexpected shutdowns. Consequently, verifying these simple physical connections can often resolve the problem quickly.
Next, examine your power plan settings in Windows. An aggressive power plan might be causing your system to shut down prematurely. Adjusting these settings to “High Performance” or ensuring that “Turn off hard disk after” is set to “Never” can prevent such critical errors. This is a vital preliminary step.
Furthermore, temporarily disable any overclocking settings. Overclocking can push your hardware beyond its stable limits, leading to system crashes. Reverting to default clock speeds helps determine if instability is the root cause. This diagnostic step is often overlooked but can be very effective.

Step-by-Step Solutions to Fix Kernel Power 41 Error
To effectively address this critical error, a structured approach is essential. This section outlines comprehensive solutions, starting with driver updates and progressing to hardware checks. Each step is designed to systematically eliminate potential causes, ensuring a thorough troubleshooting process for system instability.
Update Your Drivers
Outdated or corrupted drivers are frequent culprits behind system instability. Specifically, focus on graphics card drivers, chipset drivers, and network adapter drivers. Visit your hardware manufacturer’s website to download the latest versions. Alternatively, use Windows Update to check for driver updates. This proactive measure often resolves many system errors.
Furthermore, consider using Device Manager to uninstall and then reinstall problematic drivers. Right-click on the device, select “Uninstall device,” and then restart your computer. Windows will typically reinstall the generic driver upon reboot. Subsequently, install the manufacturer’s latest driver for optimal performance and stability.
Disable Fast Startup
Windows Fast Startup feature, while speeding up boot times, can sometimes interfere with proper system shutdowns. This can contribute to unexpected reboots. To disable it, navigate to Control Panel > Power Options > Choose what the power buttons do > Change settings that are currently unavailable. Uncheck “Turn on fast startup (recommended).”
Consequently, disabling this feature ensures a complete shutdown and fresh boot cycle each time. This can often prevent conflicts that lead to unexpected restarts. Although your boot time might increase slightly, the improved system stability is usually worth the trade-off. This simple change can be highly effective.
Run System File Checker (SFC) and DISM
Corrupted system files can also trigger unexpected shutdowns. Use the System File Checker (SFC) tool to scan for and repair corrupted Windows system files. Open Command Prompt as an administrator and type sfc /scannow. Allow the scan to complete. This process can take some time, so be patient.
Moreover, if SFC fails to fix the issues, deploy the Deployment Image Servicing and Management (DISM) tool. Use commands like DISM /Online /Cleanup-Image /RestoreHealth in an elevated Command Prompt. This tool repairs the Windows image itself, providing a more robust fix for underlying system file corruption. Therefore, combining both tools offers comprehensive file integrity checks. For other Windows-related issues, such as Error Code 0x8007000e, similar system file checks might be beneficial.
Check Event Viewer for Clues
The Event Viewer is an invaluable tool for diagnosing system instability. Open it by typing “eventvwr” in the Run dialog. Navigate to Windows Logs > System. Look for critical errors (red exclamation marks) that occurred around the time of the unexpected shutdown. These entries often provide specific error codes or details that can point to the cause.
Specifically, pay attention to events immediately preceding the Kernel-Power 41 entry. These could indicate a driver crash, hardware failure, or application conflict. Identifying these preceding events is crucial for targeted troubleshooting. Consequently, this diagnostic step can significantly narrow down the problem area.
Test Your RAM and Hard Drive
Faulty RAM or a failing hard drive can cause system instability and unexpected reboots. Run Windows Memory Diagnostic tool to check your RAM. Type “mdsched.exe” in the Run dialog and follow the prompts. This tool will restart your computer and perform a memory test. Any detected errors indicate a need to replace the RAM modules.
Furthermore, use tools like CrystalDiskInfo or the built-in chkdsk command (chkdsk /f /r) to check your hard drive’s health. Bad sectors or impending drive failure can lead to system crashes. Replacing a failing drive is essential for system stability and data integrity. Therefore, thorough hardware testing is paramount.
Diagnostic Comparison Table
Understanding the common symptoms and their potential causes can significantly speed up the troubleshooting process for this critical Windows error. The following table provides a quick reference to help you identify the most likely culprits based on observed behavior. This comparison aids in prioritizing your diagnostic efforts effectively.
| Symptom | Potential Cause | Recommended Action |
|---|---|---|
| Random reboots, no blue screen | Power supply issues, unstable overclock, faulty RAM | Check PSU, disable OC, run memory diagnostic. |
| Reboots during gaming/heavy load | Overheating, insufficient PSU wattage, GPU driver issues | Monitor temps, upgrade PSU, update graphics drivers. |
| Reboots after Windows Update | Driver conflicts, system file corruption | Rollback update, update drivers, run SFC/DISM. |
| Reboots during idle or light use | Power saving settings, background processes, minor hardware fault | Adjust power plan, check background apps, test hardware. |
Advanced Troubleshooting Techniques
If the previous steps haven’t resolved the unexpected shutdowns, more advanced methods are necessary. These techniques delve deeper into system configurations and hardware diagnostics. Consequently, they require a bit more technical understanding but can be highly effective in persistent cases. Proceed with caution and backup your data.
Adjust Power Management Settings
Sometimes, specific power management features can cause instability. In Device Manager, for network adapters and USB controllers, go to their properties, then the “Power Management” tab. Uncheck “Allow the computer to turn off this device to save power.” This prevents devices from unexpectedly losing power, which can trigger system issues.
Furthermore, within your BIOS/UEFI settings, look for power-related options. Disable C-states or EIST (Enhanced Intel SpeedStep Technology) temporarily to see if they contribute to the instability. These features manage CPU power states, and sometimes their implementation can be buggy. Reverting them to default or disabling them can help diagnose the issue.
Perform a Clean Boot
A clean boot starts Windows with a minimal set of drivers and startup programs. This helps eliminate software conflicts that might be causing system instability. Type “msconfig” in the Run dialog, go to the “Services” tab, check “Hide all Microsoft services,” and then click “Disable all.”
Next, go to the “Startup” tab, open Task Manager, and disable all startup items. Restart your computer. If the problem doesn’t occur in a clean boot state, you can then re-enable services and startup items one by one to identify the culprit. This methodical approach is very effective for software-related issues. Similarly, when troubleshooting VPN Error 809, a clean boot can help isolate conflicting applications.
Check for BIOS/UEFI Updates
An outdated BIOS or UEFI firmware can cause compatibility issues with newer hardware or Windows versions, potentially leading to unexpected system restarts. Visit your motherboard manufacturer’s website to check for the latest firmware updates. Follow their instructions carefully, as a failed BIOS update can brick your motherboard.
Therefore, ensure you have a stable power supply during the update process. BIOS updates often include stability improvements and bug fixes that can resolve persistent system issues. This step is critical for ensuring your system’s foundational software is up-to-date and compatible.
Consider a Power Supply Unit (PSU) Test
A failing or insufficient power supply unit is a very common cause of unexpected shutdowns, especially under load. If you have access to a PSU tester, use it to check the voltage outputs. Alternatively, if possible, swap your PSU with a known good one to see if the problem persists. This is often the definitive test for power-related issues.
Furthermore, ensure your PSU has adequate wattage for all your components, especially if you’ve recently upgraded your graphics card or CPU. An underpowered PSU will struggle to deliver stable power, leading to unexpected shutdowns. Investing in a reliable, appropriately sized PSU is crucial for system stability. For detailed guidance on testing your PSU, refer to authoritative resources like How-To Geek’s PSU testing guide.
Preventative Best Practices
Preventing unexpected system restarts is far easier than troubleshooting them. Adopting a few best practices can significantly reduce the likelihood of encountering this frustrating issue. Regular maintenance and mindful usage are key to maintaining a stable and reliable Windows system. These habits promote long-term system health.
Firstly, ensure your system drivers and Windows OS are always up-to-date. Regular updates often include stability fixes and performance improvements. Secondly, monitor your system temperatures, especially during intensive tasks. Overheating components can lead to crashes. Use software like HWMonitor for real-time temperature tracking.
Furthermore, invest in a high-quality, appropriately sized power supply unit. A reliable PSU is the backbone of your system’s stability. Avoid cheap, generic power supplies. Lastly, consider using a UPS (Uninterruptible Power Supply) to protect against power fluctuations and outages. This provides a clean power source and graceful shutdowns.
Frequently Asked Questions
Here are some common questions regarding this critical error and its resolution. These answers provide quick insights into frequently encountered aspects of this issue. Understanding these points can further aid in diagnosing and preventing future occurrences of system instability.
What does Kernel Power 41 Error mean?
The Kernel Power 41 Error (Event ID 41, Source Kernel-Power) signifies that your Windows computer unexpectedly shut down or restarted without a proper shutdown process. It’s a critical error indicating system instability, often pointing to power supply issues, hardware malfunctions, or driver conflicts.
Can a faulty power supply cause Kernel Power 41 Error?
Yes, a faulty or insufficient power supply unit (PSU) is one of the most common causes of the Kernel Power 41 Error. If the PSU cannot deliver stable or adequate power, especially under load, the system can unexpectedly shut down, triggering this critical error. Testing or replacing the PSU is a key diagnostic step.
Is Kernel Power 41 Error a serious problem?
Yes, the Kernel Power 41 Error is a serious problem as it indicates fundamental system instability. Frequent occurrences can lead to data corruption, hardware damage, and an unreliable computing experience. Addressing the root cause promptly is crucial to prevent further issues and ensure your system’s longevity.
📺 Video Guide: How To Fix Kernel Power 41 Error
Video walkthrough courtesy of Speedy Tutorials on YouTube. Follow along with the visual steps above.




[…] can abruptly cut off the video feed. For example, experiencing a sudden shutdown related to a Kernel Power 41 Error can cause your display to lose connection […]